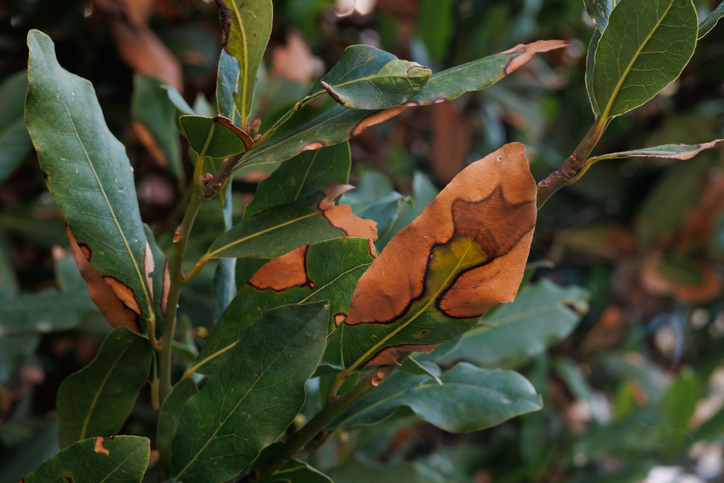
Bay trees are usually pretty tough customers, but when they start looking a bit rough around the edges, it’s often trying to tell you something important. From yellowing leaves to mysterious brown patches, these Mediterranean beauties can sulk for various reasons, and the good news is that most problems are totally fixable once you know what’s bothering them. Here’s how to figure it out, and what to do about it once you’ve discovered the issue.
1. Check if you’re drowning your bay tree with kindness.
The biggest killer of bay trees is actually too much love in the form of overwatering, which turns their roots into a soggy mess and makes the leaves go yellow faster than you can say “bay leaf pasta.” These Mediterranean natives prefer life on the drier side and get genuinely stressed when their feet are constantly wet.
Stick your finger into the soil about 5 cm deep. If it’s still damp, hold off on watering for a few more days. Bay trees in pots especially need good drainage, so make sure there are holes in the bottom and consider adding some gravel or broken crockery to help excess water escape.
2. Give your bay tree some breathing room.
Bay trees hate being cramped in tiny pots almost as much as they hate soggy soil, and they’ll show their displeasure by dropping leaves and generally looking fed up with life. If your tree has been in the same pot for more than two years, it’s probably feeling a bit claustrophobic.
Repot in spring using a container that’s about 5 cm wider than the current one, and use a good-quality multipurpose compost mixed with some grit or perlite for drainage. Don’t go too big too quickly, though, as bay trees prefer a snug fit and can get overwhelmed in massive pots.
3. Move it away from cold winds and frost.
Bay trees are tough, but they’re not fans of harsh British winters, especially when cold winds whip around their leaves and frost nips at their branches. If your tree is looking brown and crispy around the edges, it’s probably been getting a bit too much of our lovely British weather.
Move potted bay trees to a sheltered spot against a south-facing wall or into a cool greenhouse during the worst weather. If your bay is planted in the ground, wrap it in horticultural fleece during frosty spells, but remember to remove it once the weather warms up.
4. Deal with scale insects before they throw a party.
Scale insects love bay trees almost as much as we do, and they show up as tiny brown lumps stuck to the stems and undersides of leaves like uninvited guests who refuse to leave. They suck the sap and weaken the tree, while secreting sticky honeydew that attracts sooty mould.
Scrape off the scales with your fingernail or a soft brush, then spray the whole plant with insecticidal soap or neem oil. You’ll need to repeat this a few times to catch any stragglers, but persistence pays off, and your bay tree will thank you for evicting these freeloaders.
5. Feed your hungry bay tree properly.
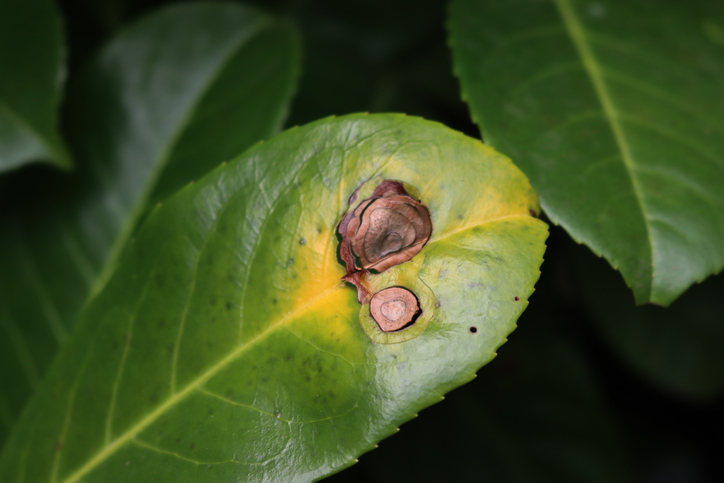
Bay trees aren’t particularly greedy, but they do appreciate a decent meal now and then, especially if they’ve been living in the same soil for ages. Yellowing leaves from the bottom up often means your tree is running low on nutrients and could use a good feed.
Use a balanced liquid fertiliser every couple of weeks during the growing season from April to September, or sprinkle some slow-release granules around the base in spring. Don’t overdo it, though—bay trees prefer a steady supply of nutrients rather than feast-or-famine feeding.
6. Improve air circulation around dense growth.
Bay trees can get a bit congested if left to their own devices, and poor air circulation creates the perfect conditions for fungal problems and pest infestations. When branches are all crowded together, moisture gets trapped and causes all sorts of issues.
Thin out overcrowded branches in late spring, removing any that are crossing, rubbing against each other, or growing inwards towards the centre. This opens up the canopy, improves airflow, and gives your bay tree a chance to breathe properly while also reducing disease problems.
7. Address brown leaf tips and edges.
Brown, crispy edges on bay leaves usually mean your tree is either too dry, too salty, or getting scorched by intense sunlight reflected off windows or paving. It’s like the plant equivalent of getting sunburned while also being dehydrated, which isn’t a pleasant combination.
Water more consistently during dry spells, move the pot away from reflective surfaces that intensify sunlight, and avoid using softened water or water that’s been through a water softener. If you live in a hard water area, try collecting rainwater for your bay tree instead.
8. Prune out diseased or damaged growth.
Any branches that look diseased, damaged, or just generally unhappy should be removed before they spread their problems to the rest of the tree. Dead wood is basically an invitation for fungi and pests to set up shop and cause more trouble.
Use clean, sharp secateurs to cut back to healthy growth, making cuts just above a leaf joint or bud. Disinfect your tools between cuts with rubbing alcohol or disinfectant wipes to prevent spreading any nasties around the plant.
9. Watch out for root problems in waterlogged soil.

If your bay tree’s leaves are turning yellow and dropping despite seemingly good care, the roots might be struggling in waterlogged soil that’s basically turned into a swamp. Root rot is silent but deadly and often goes unnoticed until the damage is quite advanced.
Gently lift the plant and check the roots—healthy ones should be firm and white or light brown, but rotten roots are black, mushy, and smell unpleasant. Trim away any damaged roots, repot in fresh, well-draining compost, and adjust your watering routine to prevent future problems.
10. Be patient while your bay tree recovers.
Bay trees aren’t drama queens, but they also don’t bounce back overnight when they’ve been poorly. Once you’ve identified and fixed the problem, it can take several weeks or even months for your tree to show signs of improvement and start producing healthy new growth.
Keep providing consistent care without fussing too much, and resist the urge to try multiple treatments at once. Bay trees respond better to steady, patient care than to dramatic interventions, so give your tree time to recover and get back to its happy, aromatic self.