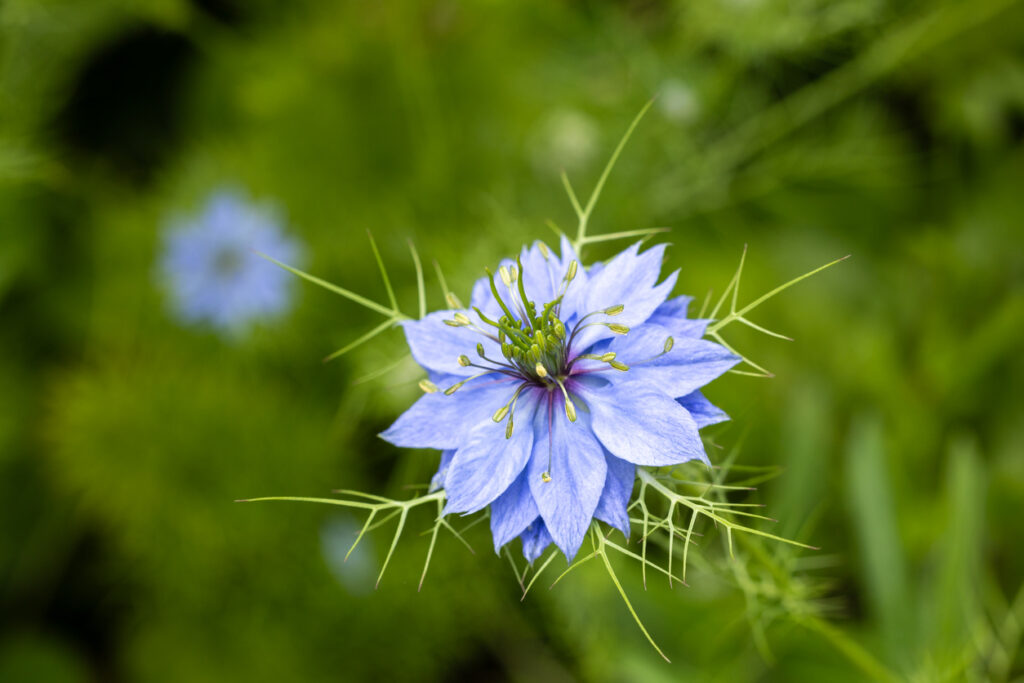
Love-in-a-mist, or Nigella damascena, is one of those plants that looks far more delicate than it really is. With its feathery foliage, jewel-like blooms, and quirky balloon seedpods, it’s a cottage-garden classic. The best part is that it’s incredibly easy to grow, even if you’re new to gardening. Here’s everything you need to know to grow Love-in-a-mist successfully, from choosing the right spot to collecting your own seed for next year.
1. Choose a sunny position.
Love-in-a-mist thrives in bright light, so aim for a spot that gets at least six hours of sun a day. Although it can cope with partial shade, you’ll get fewer flowers, and the plants may stretch towards the light, leaving them leggy and less attractive.
In the UK, a south- or west-facing border works best, though it also grows well in containers placed on a sunny patio. The extra light encourages stronger stems and bolder flowers, which makes all the difference if you’re planning to cut them for the house.
2. Prepare light, well-drained soil.
Unlike heavy feeders such as roses, Love-in-a-mist isn’t fussy, but it does need well-drained soil. If your ground is heavy clay, water may sit around the roots and cause rot. Working in grit or sand improves drainage, and a layer of compost adds just enough fertility.
If you’re growing in pots, a mix of multipurpose compost and horticultural grit creates the perfect texture. Good soil preparation means the roots establish quickly, giving you sturdier plants and better flower production throughout the season.
3. Sow seeds directly outdoors
One of the joys of Love-in-a-mist is that you don’t need to fuss with trays or transplanting. Sow the seeds directly where you want them to flower, scattering them thinly on raked soil. They germinate quickly once temperatures rise, usually in spring or early autumn.
Because the roots dislike being disturbed, direct sowing avoids transplant shock and produces stronger plants. Cover the seed lightly with soil, water gently, and within a couple of weeks you’ll see delicate seedlings pushing through.
4. Space seedlings to avoid crowding.

Although it’s tempting to leave seedlings where they land, crowding leads to weak plants and mildew. Thin them out to leave about 20–25 cm between each one. It may feel harsh, but the remaining plants will reward you with better growth and bigger flowers.
Proper spacing also shows off the fine, misty foliage that gives the plant its name. Each plant has room to breathe, which helps keep the display light and airy rather than cramped and tangled.
5. Water regularly, but avoid soggy soil.
Love-in-a-mist needs steady moisture, especially during dry spells, but it won’t thank you for waterlogged conditions. A weekly soak is usually enough once plants are established, with a little more in hot weather. Pots will need checking more often since they dry out quickly.
A mulch of garden compost helps retain moisture and keeps roots cool during summer. By keeping the soil evenly damp, you’ll support longer flowering and healthier plants without risking root problems.
6. Succession sow for a longer display.
If you want flowers all summer, sow seeds in small batches every two to three weeks. This staggered approach prevents one big flush that fades quickly and instead gives you a rolling wave of blooms right into autumn.
Succession sowing also means you’ll always have fresh stems to cut. If you love filling vases indoors, this is the simplest way to keep the supply going without gaps.
7. Provide light support if plants get tall.

In rich soil, Love-in-a-mist can grow taller than expected, with stems that flop over under the weight of flowers and seedpods. A simple ring of canes and string, or some discreet twiggy sticks pushed into the soil, is often enough to keep them upright.
This support helps the display stay neat and prevents damage in windy weather. It also means the delicate, fern-like foliage remains visible rather than collapsing into a messy heap on the ground.
8. Deadhead to keep flowers coming.
Like many annuals, Love-in-a-mist puts energy into seed production once flowers fade. If you remove dead blooms promptly, the plant responds by producing more flowers, keeping the display alive for weeks longer.
That said, don’t deadhead all of them. Leaving a few flowers to form seedpods gives you the distinctive balloon-like capsules, which dry beautifully and look stunning in arrangements.
9. Collect and save your own seeds.

Once the seedpods turn brown and dry, you can collect seeds for next year. Simply cut the pods, split them open, and store the black seeds in a paper envelope somewhere cool and dry. Label them clearly, as they look similar to nigella spice seeds used in cooking.
Saving your own seed makes growing Love-in-a-mist even more rewarding. It’s easy, cost-effective, and ensures you’ll never run out, plus you may find your plants adapt better to your own garden conditions over time.
10. Enjoy them in arrangements indoors.
Love-in-a-mist isn’t just a garden flower. Its blooms and pods make excellent cut flowers, lasting surprisingly well in water. Harvest in the morning when flowers are freshest, and they’ll hold their charm for days in a vase.
The dried pods also look striking in winter arrangements. With a little planning, you can enjoy this plant year-round, first as fresh flowers in summer and later as sculptural seed heads indoors.